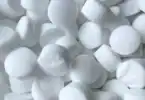
Salt is a versatile and inexpensive ingredient that can be used for many different things around the house, and the bathroom is no exception. Whether you’re looking to clean, exfoliate, or freshen up the air, these bathroom uses for salt provide ideas around salts as great tools to have in your bathroom arsenal.
In this blog post, I want to explore some clever and unexpected ways to use salt in the bathroom … from cleaning the toilet and unclogging drains to exfoliating skin and freshening up the air. If you wonder why I sometimes use the term ‘salts’ instead of ‘salt’, be sure to read What Is Salt? to learn about the array of useful household salts we have at our disposal.
Whether you’re a seasoned cleaning pro or a first-time DIY-er, you’re sure to find some useful tips and tricks in this post that will help you get the most out of this humble and powerful ingredient. So, let’s get started!
What Are Some Clever Ways To Use Salt In The Bathroom?
It’s time to get salt out of the kitchen and into the bathroom! Salt just happens to be a multi-tasker, meaning that it goes great on steak and potatoes but can also be used for various chores and cleaning regiments in the bathroom. Here is a list of 11 things salts can do for you in your bathroom As usual, I’ll break it all down below and include some quick how-to guides.
Cleaning the Toilet
Cleaning the toilet is a chore no one loves, but with this economical and efficient paste recipe it can be made much simpler. Simply mix salt and vinegar to create an effective cleaning paste! With these simple ingredients, you’ll have your toilets looking squeaky clean in no time.
- Gather Your Materials: You will need table salt, white vinegar, a scrub brush, and a toilet bowl cleaner.
- Mix the Paste: In a small bowl, mix together a 1/2 cup of table salt with enough white vinegar to make a thick paste. I use about 2 to 3 tablespoons of vinegar to get the right consistency.
- Apply the Paste: Use a toilet brush to apply the paste to the inside of the toilet bowl, focusing on any stains or areas of grime. Let the paste sit for a few minutes, to give it time to work on the stains.
- Scrub the Bowl: Use the toilet brush to scrub the inside of the toilet bowl, being sure to reach all areas, including under the rim.
- Flush the Toilet: Flush the toilet to rinse away the paste and any stains.
- Repeat if Necessary: Repeat steps 3-5 if there are still stains or areas of grime visible.
- Clean the Outside of the Toilet: Use a toilet cleaner or a mixture of baking soda and vinegar to wipe down the outside of the toilet, including the seat, lid, and base.
- Finishing Touch: After cleaning the toilet, pour a cup of vinegar into the toilet tank, this will keep the toilet bowl cleaner for longer and prevent hard water stains.
For a safe and effective means to clean your toilet bowl without utilizing harsh chemicals, this method is perfect. Before using it on an extensive surface, however, make sure you test the cleaning solution in a small area first. That way you can ensure that no staining or discoloration will occur!
Unclogging Drains
A clogged drain can be a nuisance, but fortunately, it doesn’t have to stay that way. Unclogging drains are made easy and affordable with the right ingredients! By combining baking soda (a salt) and vinegar (an acid), you can effortlessly clear out any blockage in your drains. We devote an entire article to this topic at: Salt To The Rescue: How To Unclog Drains Naturally.
Exfoliating Skin
When it comes to achieving youthful, healthy skin, exfoliation is a must. To reach this goal without harsh chemicals or fillers, try using an all-natural scrub made with salt and oil! This simple combination provides deep cleansing that helps remove impurities while giving your complexion the glow of its dreams. Here are the steps to follow:
- Gather Your Materials: You will need fine grain sea salt, coconut oil or olive oil and a mixing bowl.
- Mix the Ingredients: In a mixing bowl, mix together 1/4 cup of fine grain sea salt and 1/4 cup of coconut oil or olive oil.
- Adjust the Consistency: If the mixture is too dry, add more oil, if it’s too wet, add more salt, you should have a coarse paste consistency.
- Apply to Damp Skin: After showering or bathing, while your skin is still damp, apply the scrub to your face or body using circular motions.
- Pay Attention to Rough Areas: Focus on rough areas such as elbows, heels, and knees, but be gentle enough to avoid irritation.
- Rinse Off: After exfoliating, rinse off the scrub with warm water and pat dry with a towel.
- Moisturize: After exfoliating, it is important to moisturize your skin, this will help to lock in hydration and keep the skin looking smooth and soft.
- Repeat Once a Week: Repeat this process once a week, or as needed depending on your skin type, to achieve the best results.
With this method, you can effortlessly shed dead skin cells from your face and body to achieve a brighter, softer complexion. By combining salt with oil, you get the best of both worlds, an exfoliator gentle enough for use on sensitive areas yet powerful enough to remove stubborn dirt and debris.
Before jumping into anything new, however, always remember to test it first by applying a small amount of product on a patch of skin; if any adverse reactions occur discontinue use immediately.
Bonus Idea: Epsom Salt Exfoliant
Similar to using sea salt in oil to exfoliate your skin, Epsom salt can serve as the scrubbing ingredient. If the grains of Epsom salt are large, you may want to grind them in a mortar & pestle first to achieve a grain size of about 1mm (1/16 inch) before adding the Epsom salt to coconut oil or olive oil.
Freshening Your Mouth
Salt can be an effective ingredient to improve oral hygiene. We supply you with nine different ‘recipes’ for homemade mouthwash or mouth rinses that include salt (or salts) in the mix in our article Salt And Swish: 9 Natural Salt Mouthwash Rinses.
Soaking Tired Feet
Treat your feet to a luxurious and restorative warm saltwater bath. A perfect way to de-stress after an extended period of physical activity, this indulgent dip can help soothe fatigued muscles and leave behind silky soft skin on the soles of your feet. Here are the steps to follow:
- Gather Your Materials: You will need Epsom salt, a large bowl, or a foot bath, warm water, and a towel. Pro tip: Try using a camping or drinks cooler as your foot bath container – the water will stay warmer longer!
- Fill the Bowl or Foot Bath with Warm Water: Fill the bowl or foot bath with warm water, making sure that it’s comfortable to the touch.
- Add Epsom Salt: Add 1 tablespoon of Epsom salt for every gallon of warm water in your container. Some people like a higher concentration of this salt for detoxification, but higher concentrations can also be more drying to the skin. Do some experimentation to see how much works for you.
- Soak Your Feet: Soak your feet in the warm saltwater bath for 15-20 minutes, or as long as you like.
- Dry Your Feet: After soaking, dry your feet thoroughly with a towel.
- Moisturize Your Feet: After soaking, moisturize your feet, this will help to lock in hydration and keep the skin looking smooth and soft. If you find that your skin feels too dry after soaking, you may want to rinse your skin briefly with fresh water before doing your moisturizing step.
- Repeat as Needed: Repeat this process as needed, for best results, soak your feet at least once a week.
Relieve sore muscles and soften your feet with a simple, natural method that you can do in the peace of your own home. Soaking your feet in warm salt water not only diminishes swelling but also provides much-needed relaxation and stress relief to keep them healthy. This time-honored trick is guaranteed to enhance foot health!
Going beyond just tired feet, other bathroom uses for salt include targeted suggestions if you are dealing with athlete’s foot or toenail fungus. Foot soaking in Epsom salt can sometime help with softening your skin in order to make it simpler to remove a splinter or softening your toenails prior to nail trimming.
Bonus Idea: Foot Warmer
If you have a Himalayan Salt block – typically used in the kitchen for grilling or baking foods, you can use it to warm your feet! Just place your block in a very cool oven set at 120 degrees Fahrenheit and allow it to warm up for 15 minutes. Take the block out of the oven and wrap it in a thick bath towel. Place it on the floor or on your foot stool, then set your cold toes on top! This is a great way to warm up right before bedtime.
Cleaning Tile and Grout
Cleaning tile and grout can be a tedious task, but you can make it much easier with the power of ingredients. Rather than splurging on expensive cleaning products, create an inexpensive paste out of salt and lemon juice that will effectively get the job done! Here are the steps to follow:
- Gather Your Materials: You will need salt, lemon juice, a scrub brush, and a bucket.
- Mix the Paste: In a small bowl, mix a 1/2 cup of salt with 1/4 cup of lemon juice. Stir the mixture until it forms a thick paste.
- Apply the Paste: Use a scrub brush to apply the paste to the tile and grout, focusing on any stains or areas of dirt. Let the paste sit for a few minutes, to give it time to work on the stains.
- Scrub the Tile and Grout: Use the scrub brush to scrub the tile and grout, being sure to reach all areas, including the grout lines.
- Rinse the Tile and Grout: Rinse the tile and grout with clean water to remove the paste.
- Repeat if Necessary: Repeat steps 3-5 if there are still stains or areas of dirt visible.
- Dry the Tile and Grout: dry the tile and grout with a clean cloth or towel.
A natural and straightforward approach to maintaining cleanliness in your bathroom is using a combination of lemon juice and salt. The acidity, along with the abrasion, helps break down dirt and grime without damaging tile or grout surfaces. Furthermore, this method can effectively get rid of any stains on tiles while avoiding harsh chemicals!
Make a Salt Spray for your Hair
‘Sea Salt’ sprays are all the rage for giving hair that “I just got back from the beach” look! Salt spray can be used to achieve volume and texturing for certain hair types, including limp & fine hair and also hair that is wavy to curly. Be sure to check out this hair trend and see our recipe for making homemade sea salt spray at Sea Salt Spray: Texture Your Hair!
Soaking Piercings
When it comes to piercings, using salt may be beneficial for promoting healing and reducing inflammation. Using a saltwater solution can help to clean and disinfect the piercing, as well as reduce swelling and redness. The salt can also help to prevent infection by creating an inhospitable environment for bacteria to grow.
To use salt for piercings, you can make a saline solution by mixing 1 teaspoon of salt with 1 cup of warm water. Soak a clean cotton ball or cotton swab in the solution and gently clean the piercing.
Detoxifying Bath
Enhance your body’s well-being with a detoxifying bath. There are so many possibilities with Epsom salt baths, that we have an entire article that explores them! See Unwind and De-Stress: 9 Epsom Salt Bath Ideas.
Note that Epsom salt baths are not recommended for people with diabetes – if this is you, be sure to check with your doctor for proper medical advice.
Remember that before and after this bath for natural detoxification it’s necessary to remain hydrated because too much salt can lead to dehydration – no fun!

Making Homemade Bath Bombs
Making homemade bath bombs is an entertaining and effortless DIY project that requires only a few basic components. Here are the steps to follow:
- Gather Your Materials: You will need baking soda, citric acid, Epsom salt, corn starch, essential oils (such as lavender, peppermint, or eucalyptus), food coloring (optional), a mixing bowl, a measuring cup, and a mold (such as a silicone ice cube tray or a plastic ball mold).
- Mix Dry Ingredients: In a mixing bowl, mix 2 cups of baking soda, 1 cup of citric acid, 1/2 cup of Epsom salt, and 1/2 cup of cornstarch.
- Add Essential Oils and Food Coloring (Optional): Add 10-15 drops of your desired essential oils and a few drops of food coloring (if desired) to the dry ingredients. Mix well.
- Add Water: Slowly add water, a little at a time, to the dry ingredients while stirring. The mixture should be just damp enough to hold its shape when pressed into the molds.
- Press Mixture Into Molds: Press the mixture into the molds, making sure to pack it in tightly.
- Let Dry: Allow the bath bombs to dry for at least 24 hours in a cool, dry place. Once dry, remove them from the molds.
- Store in an Airtight Container: Once dry, store the bath bombs in an airtight container to keep them fresh. Some people like to wrap each one individually with cellophane or plastic wrap and even give them as gifts.
- Use in the Bath: To use the bath bomb, simply drop one into a warm bath, and enjoy the fizzy, fragrant, and relaxing experience.
If you are skeptical about using food coloring with salt (like I was), it turns out easier than you think – and has good results. See What Is Colored Salt And How To Make It: A Simple Guide for some tips on how to get the color mixed into your salt.
As mentioned above, Epsom salt soaks are not recommended for people with diabetes. Check with your doctor concerning use of this salt.
With this method, you can effortlessly create customized bath bombs at home using your preferred essential oils and colors. The presence of salt in these homemade treats is significant since it helps to relax the body, detoxify the skin, as well as provide aromatherapeutic effects. Make your own bath bombs today!
Cleaning Hairbrushes
Cleaning hairbrushes and combs can be a real chore, yet with the correct ingredients, it is simplified. An affordable solution is to create a cleaning mixture of salt and shampoo – this method will leave your brush or comb sparkling clean! Here are the steps to follow:
- Gather Your Materials: You will need shampoo, coarse salt, a scrub brush, and a bowl.
- Mix the Cleaning Solution: In a bowl, mix 2 tablespoons of shampoo and 1/4 cup of coarse salt. Mix it well until it forms a paste. Add a bit of water to get the right consistency for spreading the paste.
- Apply the Solution: Take each brush or comb, and dip it in the cleaning solution. Use the scrub brush to work the paste into the bristles or teeth.
- Scrub the Brush or Comb: Scrub the brush or comb for a few minutes, focusing on the bristles or teeth, to remove any product build-up and grime.
- Rinse the Brush or Comb: Rinse the brush or comb thoroughly with warm water to remove the cleaning solution.
- Dry the Brush or Comb: Dry the brush or comb with a clean cloth or towel.
- Repeat as Needed: Repeat this process as needed, for best results, clean your hairbrushes and combs at least once a month.
Utilizing this technique, you can clean your hairbrushes and combs without utilizing dubious chemicals. It will also help to eliminate product accumulation, leaving them sparklingly clean! Keeping brushes and combs free of dirt is essential as they are vulnerable to the multiplication of bacteria or even fungal growth that could irritate scalps or cause other scalp conditions.
Salt turns out to be a great cleaning agent for brushing away such grime efficiently while providing anti-fungal and antibacterial benefits at the same time; making it a perfect choice for brush maintenance!
Salt Sources
The salts mentioned on this page are readily available at the grocery store or ‘big box’ store. However, if you are looking for some nicer Epsom salt blends or even some salts that are packaged in a way that they can be used as a gift, here are some ideas you might like.
This aromatic bath salt blend incorporates pink Himalayan salt with the main ingredient of Epsom salt. Lavender essential oil is also used. Do note that while this soaking solution does say "No artificial dyes or additives", the picture is rather purple colored so take care if you are someone that is sensitive to perfumes or dyes. This package contains 2 pounds (32 ounces) of bath salt blend.

This beautifully packaged gift set comes with six 120 gram jars of Epsom Salt. Combinations include Lavender Epsom Salt, Tea Tree Epsom Salt, Lemon Basil Epsom Salt, Coconut Epsom Salt, Honey Almond Epsom Salt, and Eucalyptus Spearmint Epsom Salt. Each marble-patterned gift box comes with a Wooden Salt spoon for scooping out your favorites into your bath water.

Final Thoughts
Well, there you have it: 11 bathroom uses for salt! I’m sure there are more and I hope this list has inspired you to use salt in new and interesting ways. Whether you’re using salt for cleaning, relaxation, beauty, or health purposes, it is surely a very versatile item to have around the bathroom!
So the next time you reach for your salt shaker remember, there’s much more salt can do besides seasoning food. Give these bathroom uses for salt tips a try and see for yourself. Happy salt-ing!
Featured Photo by Tara Winstead. Bath Photo by Monstera Production.